Η δοκιμή του κινητήρα ενός ηλεκτρικού ποδηλάτου (e-bike) μπορεί να φαίνεται περίπλοκη στην αρχή, αλλά με τα κατάλληλα εργαλεία και μια συστηματική προσέγγιση, μπορείτε να διαγνώσετε γρήγορα τα συνήθη προβλήματα. Είτε είστε αναβάτης που συντηρεί το δικό σας ηλεκτρονικό ποδήλατο είτε τεχνικός που αντιμετωπίζει προβλήματα σε ποδήλατα πελατών, η κατανόηση του τρόπου σωστής δοκιμής του κινητήρα είναι απαραίτητη για την απόδοση και την ασφάλεια.
Σε αυτόν τον οδηγό, εξηγούμε τα πιο σημαντικά εργαλεία, τις μεθόδους δοκιμής βήμα προς βήμα και τις συμβουλές αντιμετώπισης προβλημάτων για τους ηλεκτρικούς κινητήρες ποδηλάτων, συμπεριλαμβανομένων των κινητήρων πλήμνης, των ελεγκτών και των αισθητήρων Hall.
Γιατί να δοκιμάσετε ένα μοτέρ ηλεκτρικού ποδηλάτου;
Ο κινητήρας του ηλεκτρικού ποδηλάτου είναι η καρδιά του συστήματος, υπεύθυνος για τη μετατροπή της ενέργειας της μπαταρίας σε μηχανική κίνηση. Με την πάροδο του χρόνου, μπορεί να εμφανιστούν προβλήματα, όπως αδύναμη επιτάχυνση, διακοπτόμενη διακοπή λειτουργίας ή πλήρης βλάβη του κινητήρα. Ο τακτικός έλεγχος σας βοηθάει:
- Εντοπίστε τις βλάβες νωρίς πριν προκαλέσουν μεγάλες ζημιές
- Διασφάλιση της ασφάλειας με τον εντοπισμό προβλημάτων υπερθέρμανσης ή καλωδίωσης
- Βελτιστοποίηση των επιδόσεων και της διάρκειας ζωής της μπαταρίας
- Εξοικονόμηση δαπανών για επισκευές και αντικαταστάσεις
Απαραίτητα εργαλεία για τη δοκιμή ενός μοτέρ ηλεκτρικού ποδηλάτου
Όταν ετοιμάζεστε να ελέγξετε έναν κινητήρα ηλεκτρονικού ποδηλάτου, θα χρειαστείτε μερικά εξειδικευμένα εργαλεία που χρησιμοποιούνται συνήθως στην ηλεκτρική διάγνωση:
1. Πολύμετρο
ΕΝΑ πολύμετρο μετράει τάση, ρεύμα και αντίσταση. Είναι το πιο ευέλικτο εργαλείο για τη δοκιμή ενός ηλεκτροκινητήρα ποδηλάτου. Μπορείτε να το χρησιμοποιήσετε για:
- Ελέγξτε την τάση εξόδου της μπαταρίας
- Δοκιμή αντίστασης στις περιελίξεις του κινητήρα
- Επαλήθευση της λειτουργικότητας του αισθητήρα Hall
2. Βολτόμετρο
ΕΝΑ βολτόμετρο έχει σχεδιαστεί ειδικά για τη μέτρηση τάσης. Ενώ ένα πολύμετρο εκτελεί επίσης αυτή τη λειτουργία, ένα βολτόμετρο είναι βολικό για να ελέγχετε γρήγορα αν ο κινητήρας λαμβάνει επαρκή ισχύ από την μπαταρία.
3. Αμπερόμετρο
Ένα αμπερόμετρο μετρά τη ροή ρεύματος. Είναι ιδιαίτερα χρήσιμο για τη διάγνωση του κατά πόσον ο κινητήρας απορροφά την αναμενόμενη ποσότητα ρεύματος. Το ασυνήθιστα υψηλό ρεύμα μπορεί να υποδεικνύει βραχυκυκλώματα, ενώ το ασυνήθιστα χαμηλό ρεύμα μπορεί να υποδεικνύει προβλήματα καλωδίωσης ή σύνδεσης.
4. Ελεγκτής κινητήρα
Ο ελεγκτής κινητήρα ρυθμίζει την ταχύτητα, τη ροπή και την απόδοση ισχύος. Κατά τη διάρκεια των δοκιμών, ο ελεγκτής όχι μόνο βοηθά στον έλεγχο της συμπεριφοράς του κινητήρα, αλλά μπορεί επίσης να παρέχει ανατροφοδότηση σχετικά με στατιστικά στοιχεία του συστήματος, όπως η τάση της μπαταρίας και οι κωδικοί σφαλμάτων.
Βήμα προς βήμα Δοκιμές και αντιμετώπιση προβλημάτων
Βίντεο Προτείνετε:
1. Δοκιμή του διακόπτη On/Off
Εάν ο κινητήρας δεν εκκινείται ή σβήνει απότομα, ο διακόπτης ή ο ελεγκτής μπορεί να είναι ελαττωματικός.
- Ενεργοποιήστε το ποδήλατο και κρατήστε το αναμμένο για τουλάχιστον ένα λεπτό.
- Παρατηρήστε αν ο κινητήρας ενεργοποιείται ομαλά ή αν διακόπτεται περιοδικά.
- Εάν τρεμοπαίζει ή δεν λειτουργεί, το πρόβλημα μπορεί να οφείλεται σε μια κατεστραμμένη σύνδεση ή σε έναν ελαττωματικό διακόπτη.
2. Έλεγχος της καλωδίωσης
Οι χαλαρές ή διαβρωμένες συνδέσεις είναι ένα από τα πιο συνηθισμένα προβλήματα.
- Ελέγξτε την καλωδίωση μεταξύ των κινητήρας, μπαταρία και ελεγκτής.
- Αναζητήστε σκουριά, βρωμιά, ξεφτισμένη μόνωση ή σκουπίδια στο εσωτερικό των συνδέσμων.
- Ελέγξτε για ενδείξεις υπερθέρμανσης, όπως λιωμένη μόνωση ή μυρωδιά καμένου πλαστικού. Αυτό το ζήτημα είναι ιδιαίτερα συχνό σε κιτ μετασκευής e-bike, όπου η εγκατάσταση μετά την αγορά οδηγεί μερικές φορές σε κακές συνδέσεις.
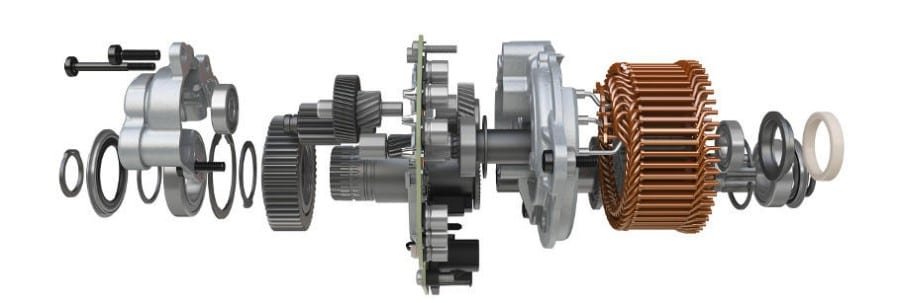
3. Σκέψεις για τον κινητήρα της οπίσθιας πλήμνης
Εάν το ηλεκτρονικό σας ποδήλατο χρησιμοποιεί μοτέρ οπίσθιου πλήμνου τροχού, δώστε ιδιαίτερη προσοχή στην καλωδίωση του. Τα καλώδια μπορεί να υποστούν κάμψη, συστροφή και κραδασμούς στο δρόμο, με αποτέλεσμα να είναι επιρρεπή σε εσωτερικές ζημιές. Η ελαττωματική καλωδίωση όχι μόνο μειώνει την απόδοση, αλλά δημιουργεί επίσης κίνδυνο πυρκαγιάς εάν αγνοηθεί.
4. Δοκιμή αισθητήρων Hall
Οι περισσότεροι κινητήρες πλήμνης περιλαμβάνουν Αισθητήρες Hall, τα οποία παρακολουθούν τη θέση του ρότορα και στέλνουν σήματα στον ελεγκτή για συγχρονισμό.
- Κάθε αισθητήρας Hall έχει τρία καλώδια και απαιτεί είσοδο τάσης.
- Για δοκιμή:
- Χρησιμοποιήστε ένα πολύμετρο σε λειτουργία DC.
- Συνδέστε την μπαταρία του ποδηλάτου για την τροφοδοσία του αισθητήρα.
- Δοκιμάστε τα καλώδια του αισθητήρα με τα καλώδια του πολυμέτρου.
- Συγκρίνετε τις ενδείξεις με την ονομαστική τάση που αναφέρεται στο εγχειρίδιο του ηλεκτρονικού ποδηλάτου σας. Εάν ένας αισθητήρας Hall αποτύχει, ο κινητήρας θα σταματήσει, θα λειτουργεί αναποτελεσματικά ή δεν θα λειτουργήσει καθόλου.
Συμβουλές ασφαλείας κατά τη δοκιμή κινητήρων E-Bike
- Πάντα αποσυνδέστε την μπαταρία πριν επιθεωρήσετε την καλωδίωση.
- Χρησιμοποιήστε μονωμένα εργαλεία για να αποφύγετε βραχυκυκλώματα.
- Αποφύγετε τη λειτουργία του κινητήρα σε υψηλά φορτία κατά τη διάρκεια των δοκιμών χωρίς κατάλληλη τοποθέτηση.
- Φοράτε προστατευτικά γάντια εάν επιθεωρείτε υπερθερμασμένα ή λιωμένα εξαρτήματα.
Κοινά προβλήματα και γρήγορες λύσεις
| Σύμπτωμα | Πιθανή αιτία | Συνιστώμενη δοκιμή |
|---|---|---|
| Ο κινητήρας δεν ξεκινάει | Ελαττωματικός ελεγκτής, σπασμένος διακόπτης | Διακόπτης δοκιμής, έλεγχος τάσης ελεγκτή |
| Ο κινητήρας διακόπτεται κατά διαστήματα | Χαλαρή καλωδίωση, υπερθερμασμένες συνδέσεις | Ελέγξτε τους συνδέσμους για σκουριά ή τήξη |
| Αδύναμη επιτάχυνση | Ελαττωματικοί αισθητήρες Hall ή χαμηλή μπαταρία | Χρησιμοποιήστε πολύμετρο για να ελέγξετε την τάση Hall |
| Υπερβολική θερμότητα | Υπερφορτωμένος κινητήρας, βραχυκύκλωμα | Ελέγξτε το αμπερόμετρο για μη φυσιολογική κατανάλωση ρεύματος |
Σύναψη
Η δοκιμή ενός κινητήρα ηλεκτρικού ποδηλάτου απαιτεί υπομονή και τα κατάλληλα διαγνωστικά εργαλεία. Ένα πολύμετρο, ένα βολτόμετρο, ένα αμπερόμετρο και ένας ελεγκτής κινητήρα είναι απαραίτητα για τον εντοπισμό των περισσότερων προβλημάτων. Ελέγχοντας προσεκτικά τους διακόπτες, την καλωδίωση, τις συνδέσεις του κινητήρα πλήμνης και τους αισθητήρες Hall, μπορείτε να λύσετε πολλά προβλήματα χωρίς να χρειαστείτε δαπανηρές αντικαταστάσεις.
Η τακτική συντήρηση και οι δοκιμές όχι μόνο διατηρούν το ηλεκτρονικό ποδήλατό σας αξιόπιστο, αλλά και παρατείνουν τη συνολική διάρκεια ζωής του. Εάν δεν είστε σίγουροι ή εντοπίσετε σημαντικές βλάβες, συμβουλευτείτε έναν εξειδικευμένο τεχνικό για να αποφύγετε την πρόκληση ζημιάς σε ευαίσθητα εξαρτήματα.