Att testa en elcykelmotor kan verka komplicerat till en början, men med rätt verktyg och ett systematiskt tillvägagångssätt kan du snabbt diagnostisera vanliga problem. Oavsett om du är en cyklist som underhåller din egen elcykel eller en tekniker som felsöker kundcyklar, är det viktigt för prestanda och säkerhet att du förstår hur du testar motorn på rätt sätt.
I den här guiden förklarar vi de viktigaste verktygen, steg-för-steg-testmetoder och felsökningstips för elektriska cykelmotorer - inklusive navmotorer, styrenheter och Hall-sensorer.
Varför testa en elcykelmotor?
En elcykelmotor är hjärtat i systemet och ansvarar för att omvandla batteriström till mekanisk rörelse. Med tiden kan problem som svag acceleration, intermittenta avstängningar eller fullständigt motorbortfall uppstå. Regelbunden testning hjälper dig:
- Upptäck fel tidigt innan de orsakar större skador
- Säkerställa säkerheten genom att identifiera problem med överhettning eller kabeldragning
- Optimera prestanda och batteritid
- Spara kostnader för reparationer och utbyten
Viktiga verktyg för att testa en elcykelmotor
När du ska testa en elcykelmotor behöver du några specialverktyg som vanligtvis används vid elektrisk diagnostik:
1. Multimeter
En multimeter mäter spänning, ström och motstånd. Det är det enskilt mest mångsidiga verktyget för att testa en elektrisk cykelmotor. Du kan använda den för att:
- Kontrollera batteriets utgångsspänning
- Testa motståndet mellan motorlindningarna
- Verifiera hallsensorns funktionalitet
2. Voltmeter
En Voltmeter är speciellt utformad för att mäta spänning. Även om en multimeter också kan utföra denna funktion är en voltmeter lämplig för att snabbt kontrollera om motorn får tillräckligt med ström från batteriet.
3. Amperemeter
En Amperemeter mäter strömflödet. Det är särskilt användbart för att diagnostisera om motorn drar den förväntade mängden ström. Onormalt hög ström kan tyda på kortslutning, medan ovanligt låg ström kan tyda på problem med ledningar eller anslutningar.
4. Motorstyrenhet
De motorstyrenhet reglerar hastighet, vridmoment och uteffekt. Under testningen hjälper styrenheten inte bara till att kontrollera motorns beteende utan kan också ge feedback om systemstatistik som batterispänning och felkoder.
Steg-för-steg-testning och felsökning
Video Rekommendera:
1. Test av på/av-omkopplaren
Om motorn inte startar eller stängs av plötsligt kan det vara fel på brytaren eller styrenheten.
- Slå på strömmen till cykeln och håll den påslagen i minst en minut.
- Observera om motorn aktiveras mjukt eller om den stängs av med jämna mellanrum.
- Om den blinkar eller inte fungerar kan det bero på en skadad anslutning eller en felaktig strömbrytare.
2. Kontroll av kabeldragning
Lösa eller korroderade anslutningar är ett av de vanligaste problemen.
- Inspektera ledningarna mellan motor, batteri och styrenhet.
- Leta efter rost, smuts, trasig isolering eller skräp inuti kontakterna.
- Kontrollera om det finns tecken på överhettning, t.ex. smält isolering eller en lukt av bränd plast. Detta problem är särskilt vanligt i eftermonteringssatser för elcyklar, där eftermarknadsinstallationer ibland leder till dåliga anslutningar.
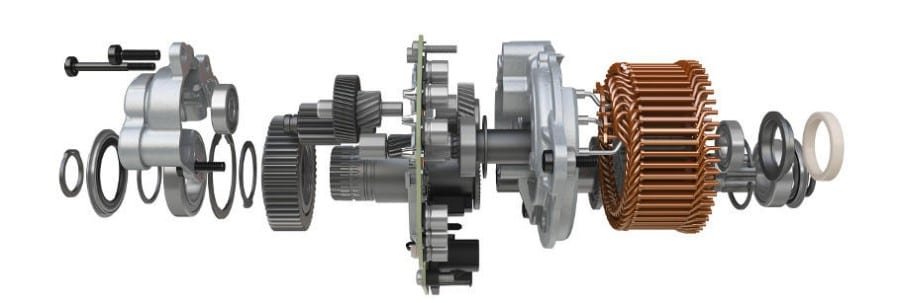
3. Överväganden om bakre navmotorer
Om din elcykel använder en bakre navmotorVar särskilt uppmärksam på ledningsnätet. Ledningarna kan utsättas för böjning, vridning och vägvibrationer, vilket gör dem benägna att skadas invändigt. Felaktiga kablar försämrar inte bara prestandan utan utgör också en brandrisk om de ignoreras.
4. Test av hallsensorer
De flesta navmotorer inkluderar Hallsensorersom följer rotorns position och skickar signaler till styrenheten för synkronisering.
- Varje hallsensor har tre ledningar och kräver spänningstillförsel.
- För att testa:
- Använd en multimeter i DC-läge.
- Anslut cykelns batteri för att strömförsörja sensorn.
- Prova givarkablarna med multimeterns sladdar.
- Jämför avläsningarna med märkspänningen i handboken för din elcykel. Om en Hall-sensor går sönder kommer motorn att stampa, gå ineffektivt eller inte fungera alls.
Säkerhetstips vid testning av elcykelmotorer
- Alltid koppla bort batteriet innan du inspekterar ledningarna.
- Använd isolerade verktyg för att förhindra kortslutning.
- Undvik att köra motorn med hög belastning under provning utan korrekt montering.
- Använd skyddshandskar vid inspektion av överhettade eller smälta komponenter.
Vanliga problem och snabba lösningar
| Symptom | Möjlig orsak | Rekommenderat test |
|---|---|---|
| Motorn går inte att starta | Felaktig styrenhet, trasig brytare | Testa brytaren, kontrollera styrspänningen |
| Motorn stängs av intermittent | Lösa ledningar, överhettade anslutningar | Inspektera anslutningarna för rost eller smältning |
| Svag acceleration | Felaktiga hallsensorer eller svagt batteri | Använd multimeter för att kontrollera hallspänningen |
| Överdriven värme | Överbelastad motor, kortslutning | Kontrollera amperemätaren för onormalt strömuttag |
Slutsats
Att testa en elcykelmotor kräver tålamod och rätt diagnosverktyg. En multimeter, voltmeter, amperemeter och motorstyrenhet är nödvändiga för att identifiera de flesta problem. Genom att noggrant kontrollera brytare, kablage, navmotoranslutningar och Hall-sensorer kan du lösa många problem utan att behöva göra kostsamma byten.
Regelbundet underhåll och testning håller inte bara din elcykel pålitlig utan förlänger också dess totala livslängd. Om du är osäker eller upptäcker större fel bör du kontakta en kvalificerad tekniker för att undvika att skada känsliga komponenter.